Soil Moisture Detector w/ Ardunio
To conduct the experiment, I began by writing Arduino code to collect raw readings from the capacitive soil moisture sensor. I recorded baseline values for different soil conditions—fully submerged in water, dry soil, moist soil, and exposed to air—as control references. With those ranges established, I then programmed the OLED display to show real-time soil moisture readings, converting sensor values into percentage format. I also used threshold ranges to indicate whether the soil was “Dry” or “Moist” on the display. While the experiment was not without error—capacitive sensors are known for occasional inaccuracy—it still demonstrated how multiple skills in coding, electronics, and design can come together in a meaningful hands-on project.
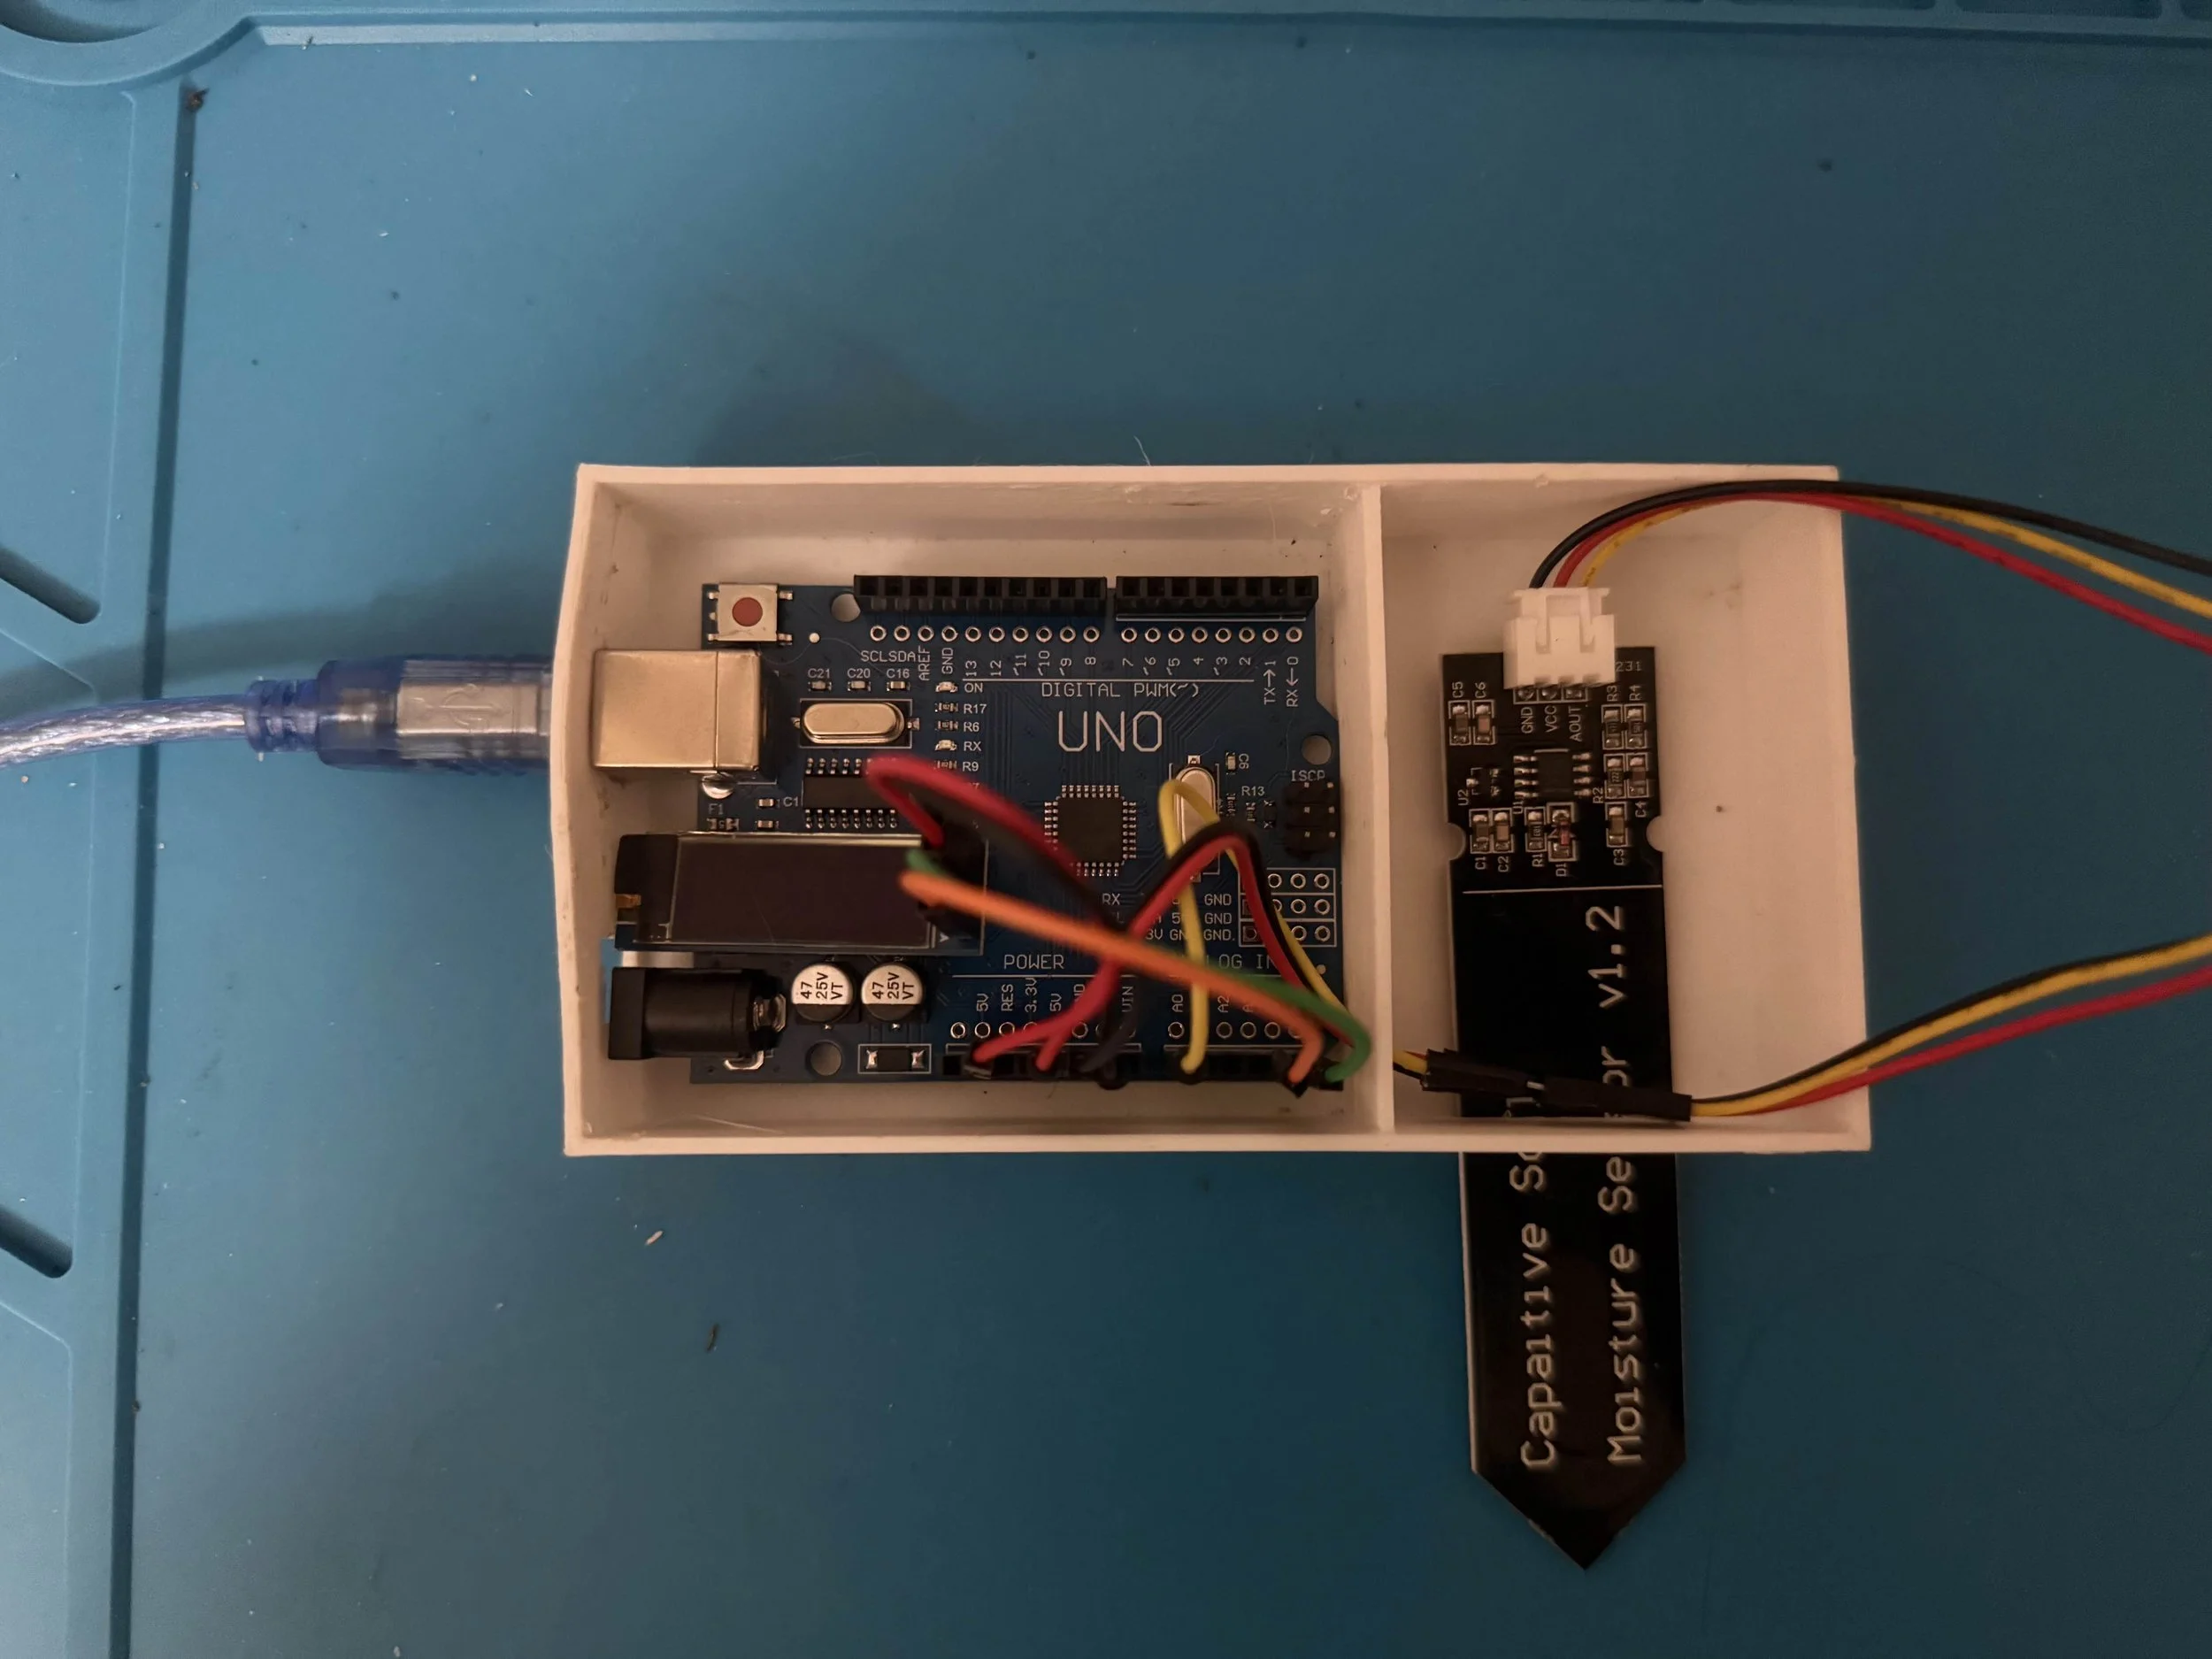
This project introduced me to hardware prototyping with Arduino and real-time data display using an OLED screen. The goal was to build a soil moisture monitoring system that reads analog input from a capacitive sensor, converts it into a percentage based on calibration, and displays live feedback on the screen inside a custom 3D-printed enclosure.
Through the process, I learned how to calibrate sensor readings, work with I2C devices like OLED displays, and troubleshoot both hardware and software issues such as display refresh and analog noise. I also practiced integrating components into a compact, functional layout. This project strengthened my skills in electronics, embedded programming, and physical design—all essential for real-world engineering applications.
Out-of-Soil Reading
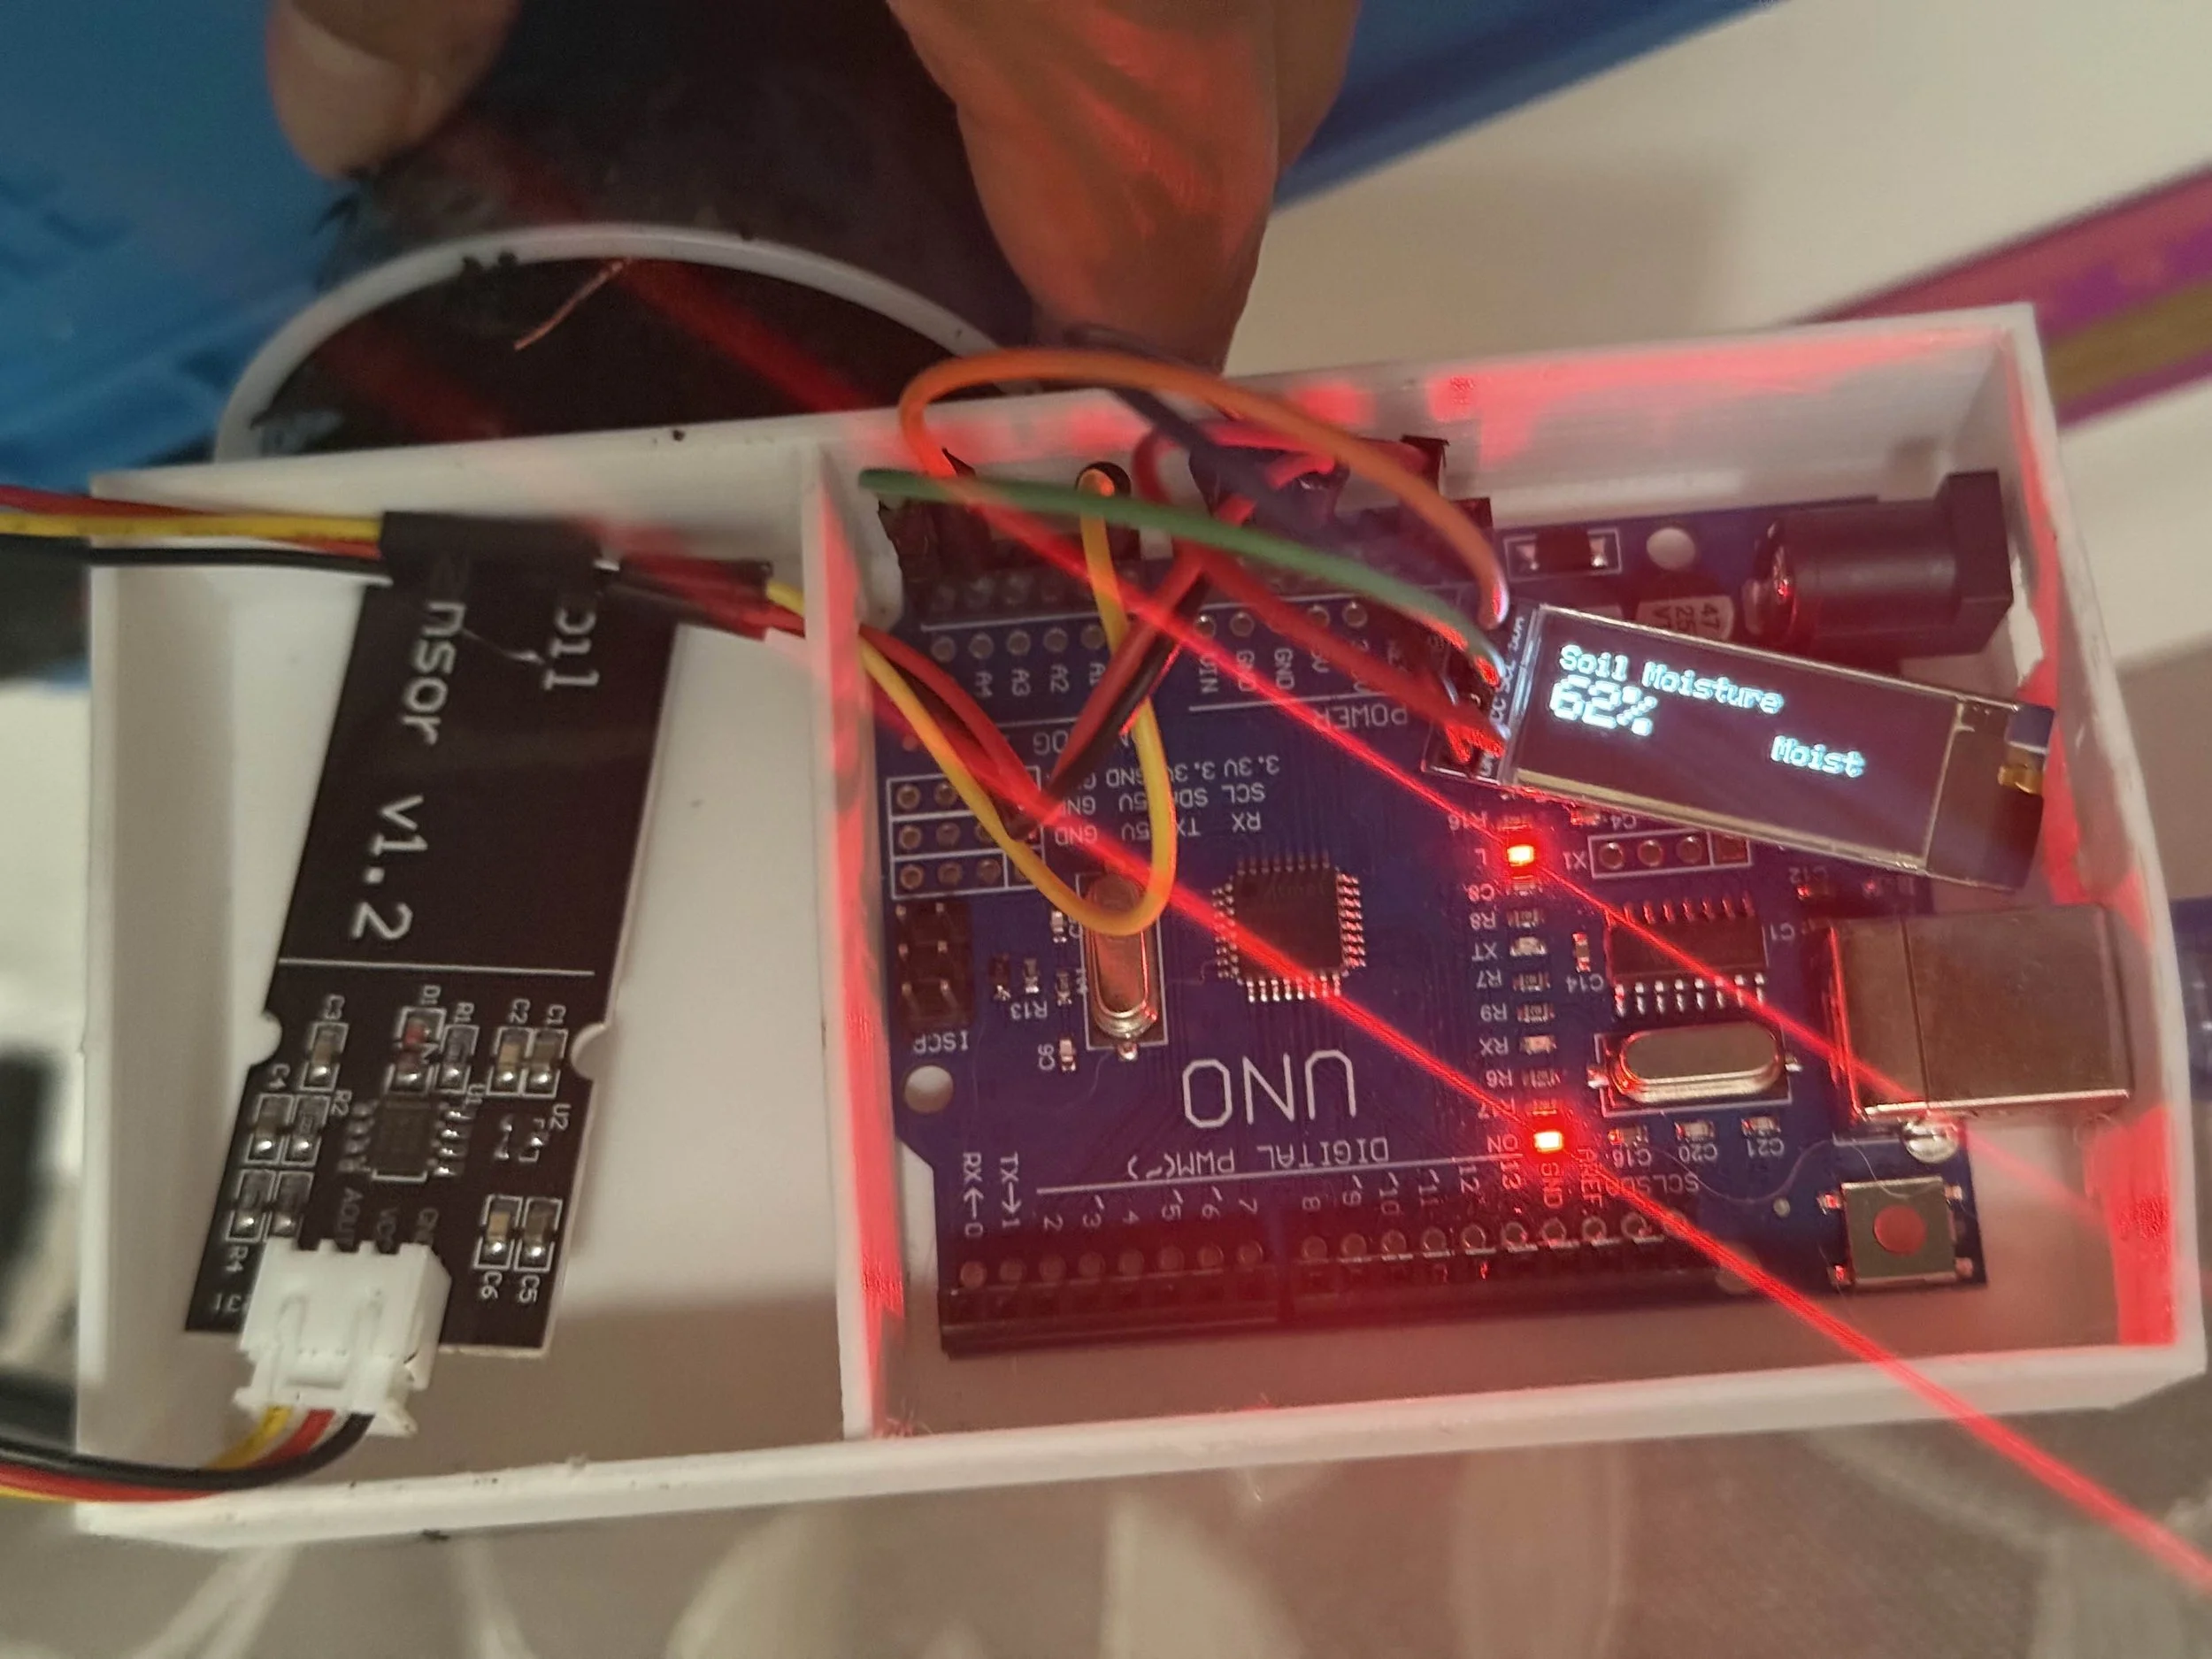
Moist Soil Reading

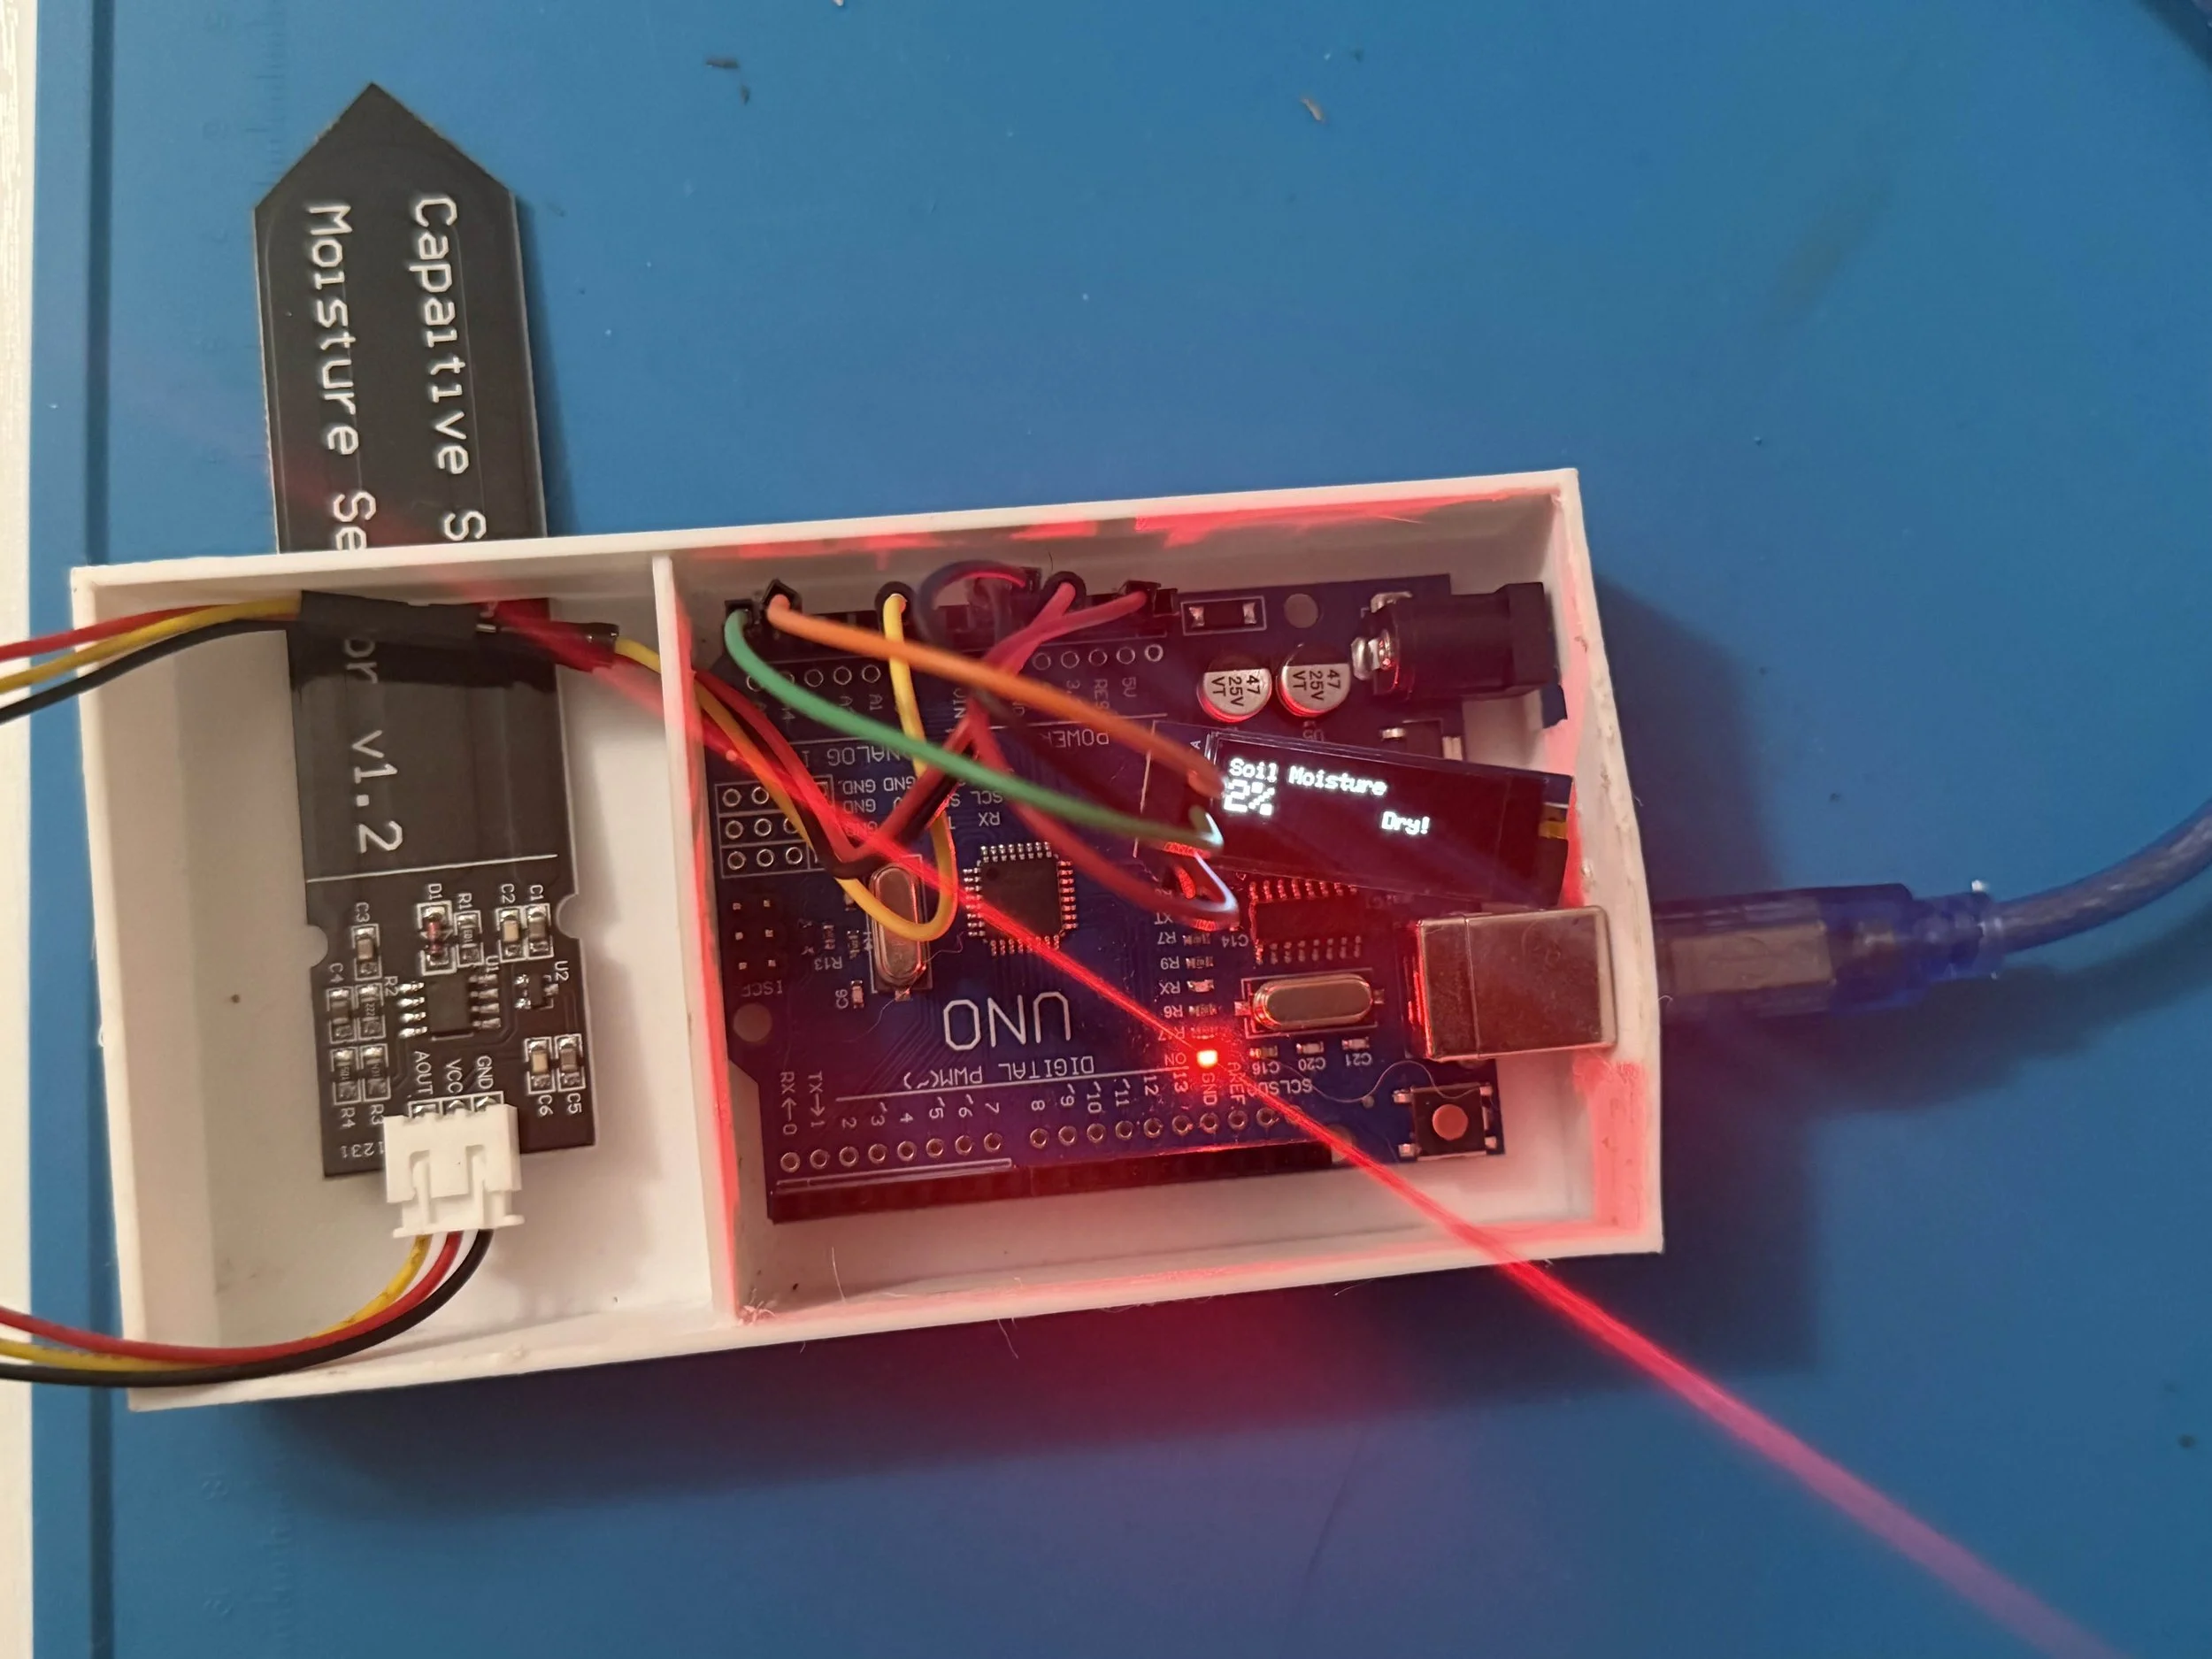
Dry Soil Reading
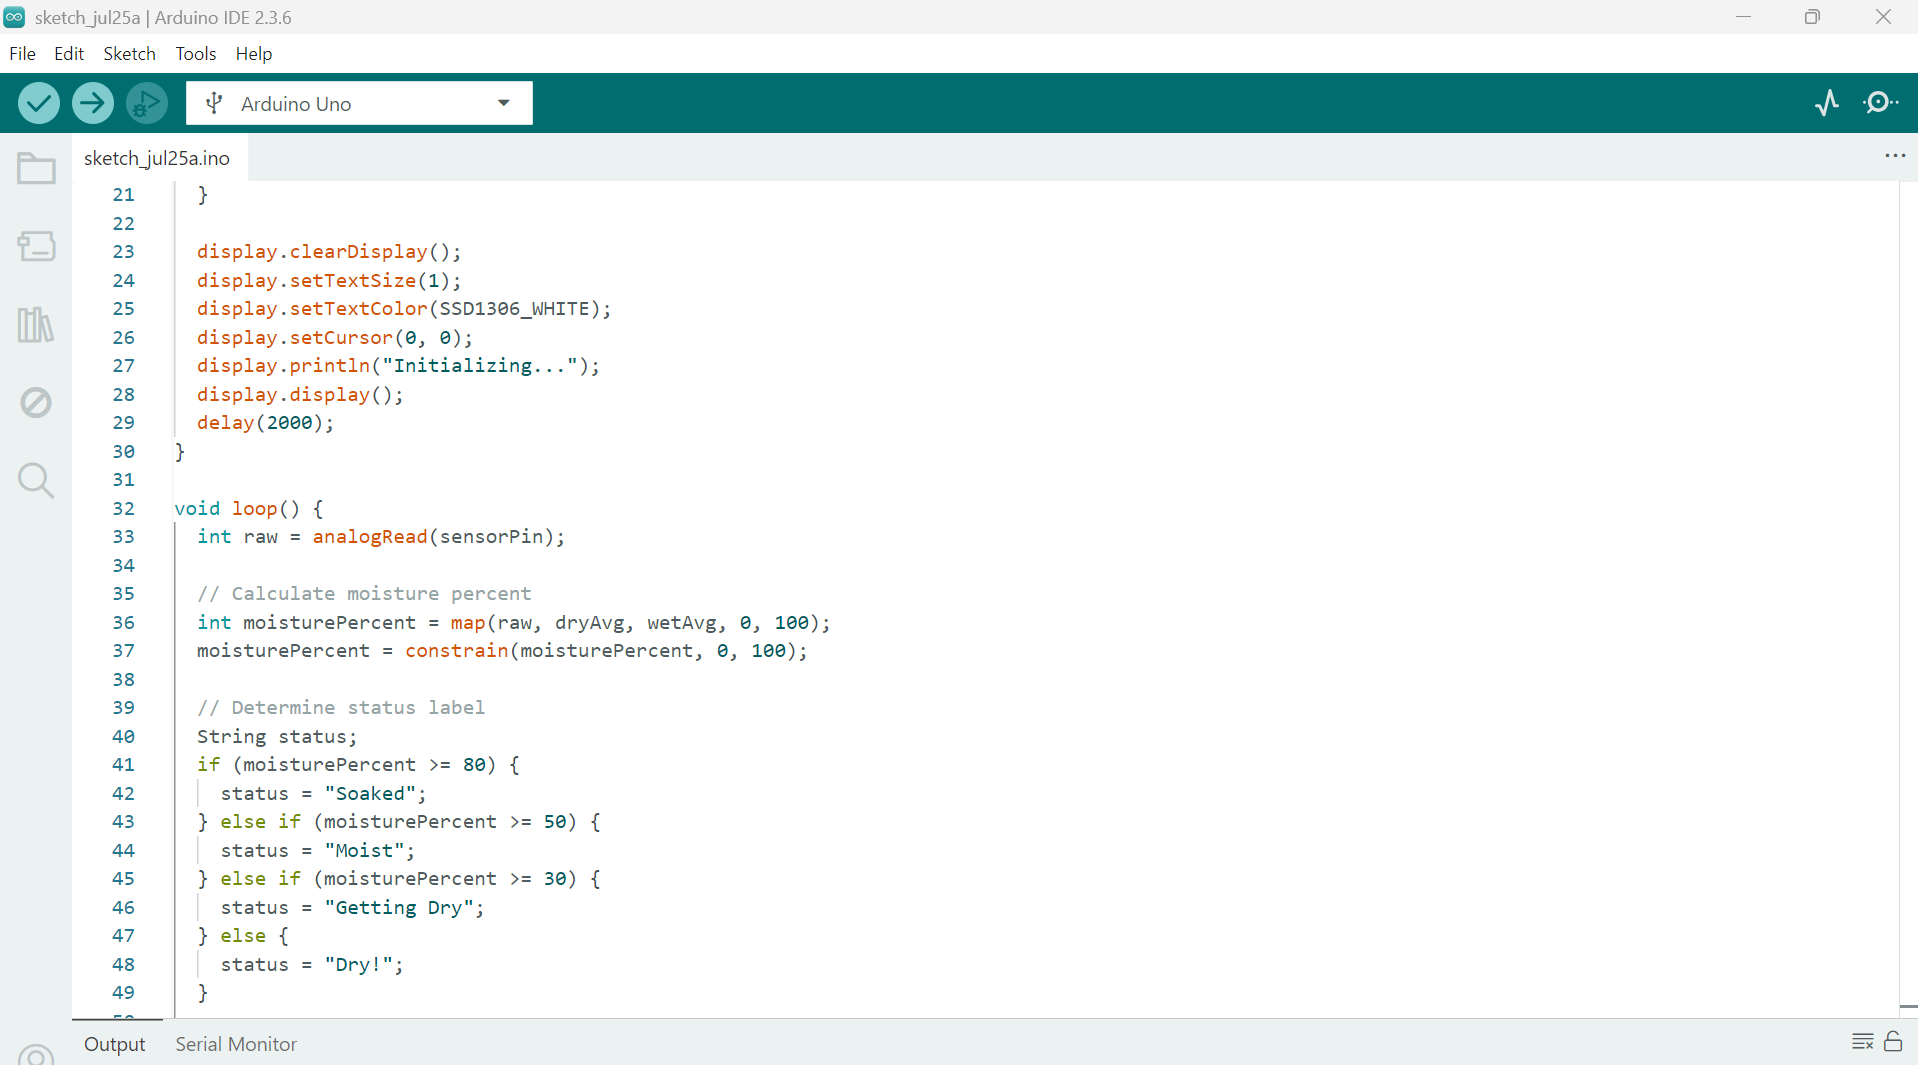
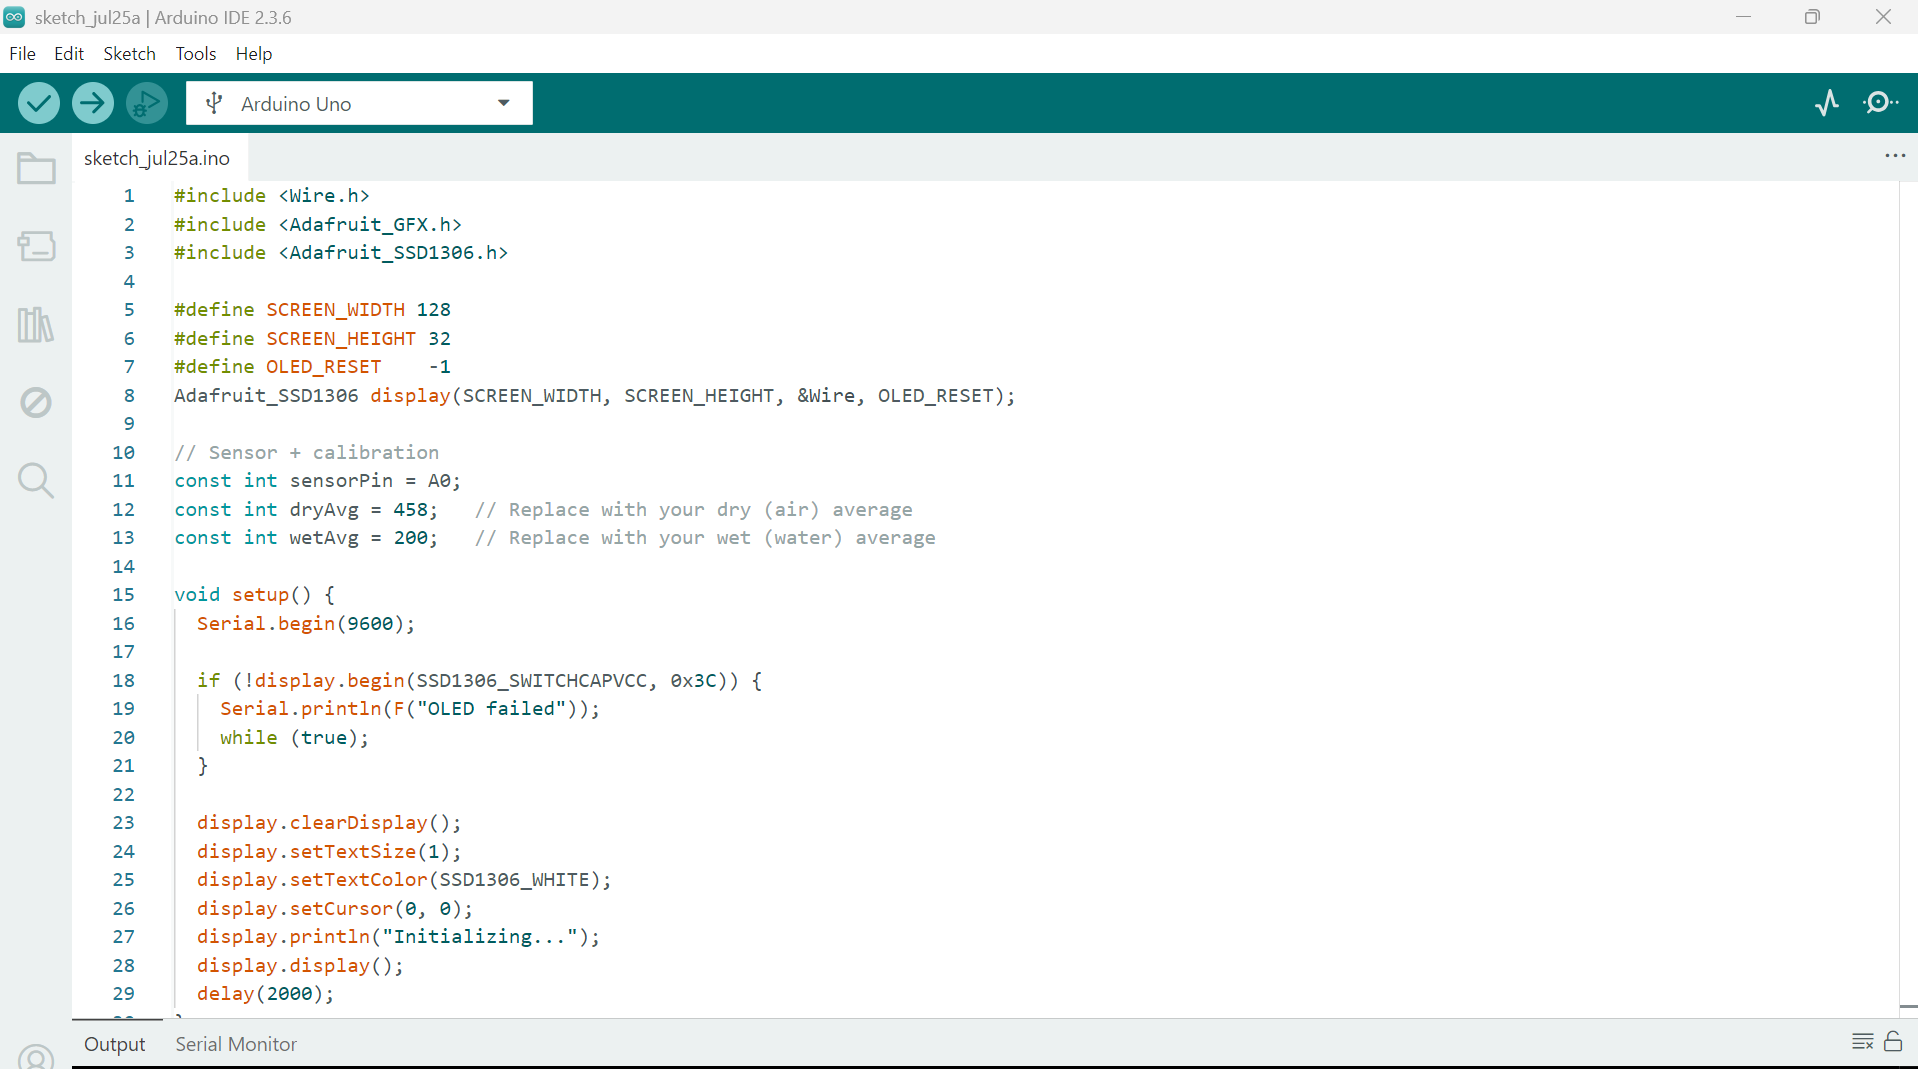
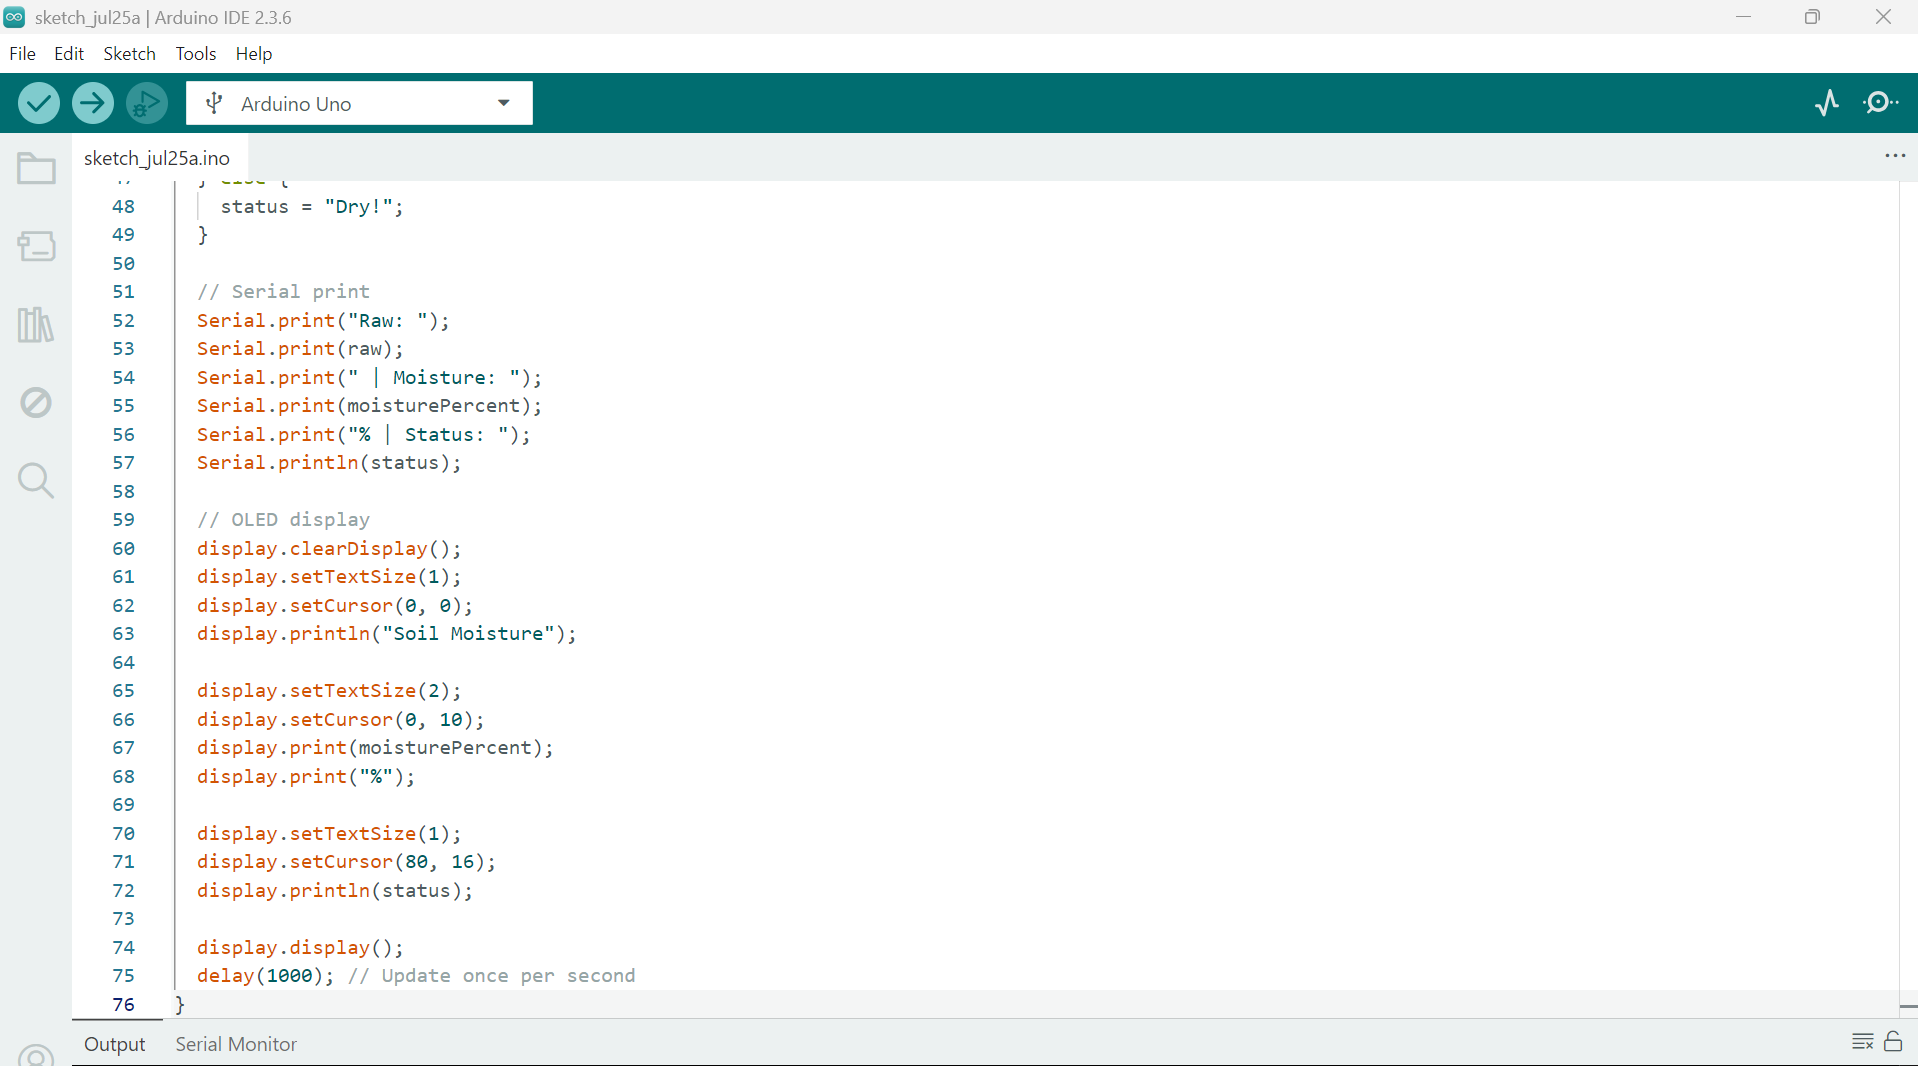
Final Arduino Code
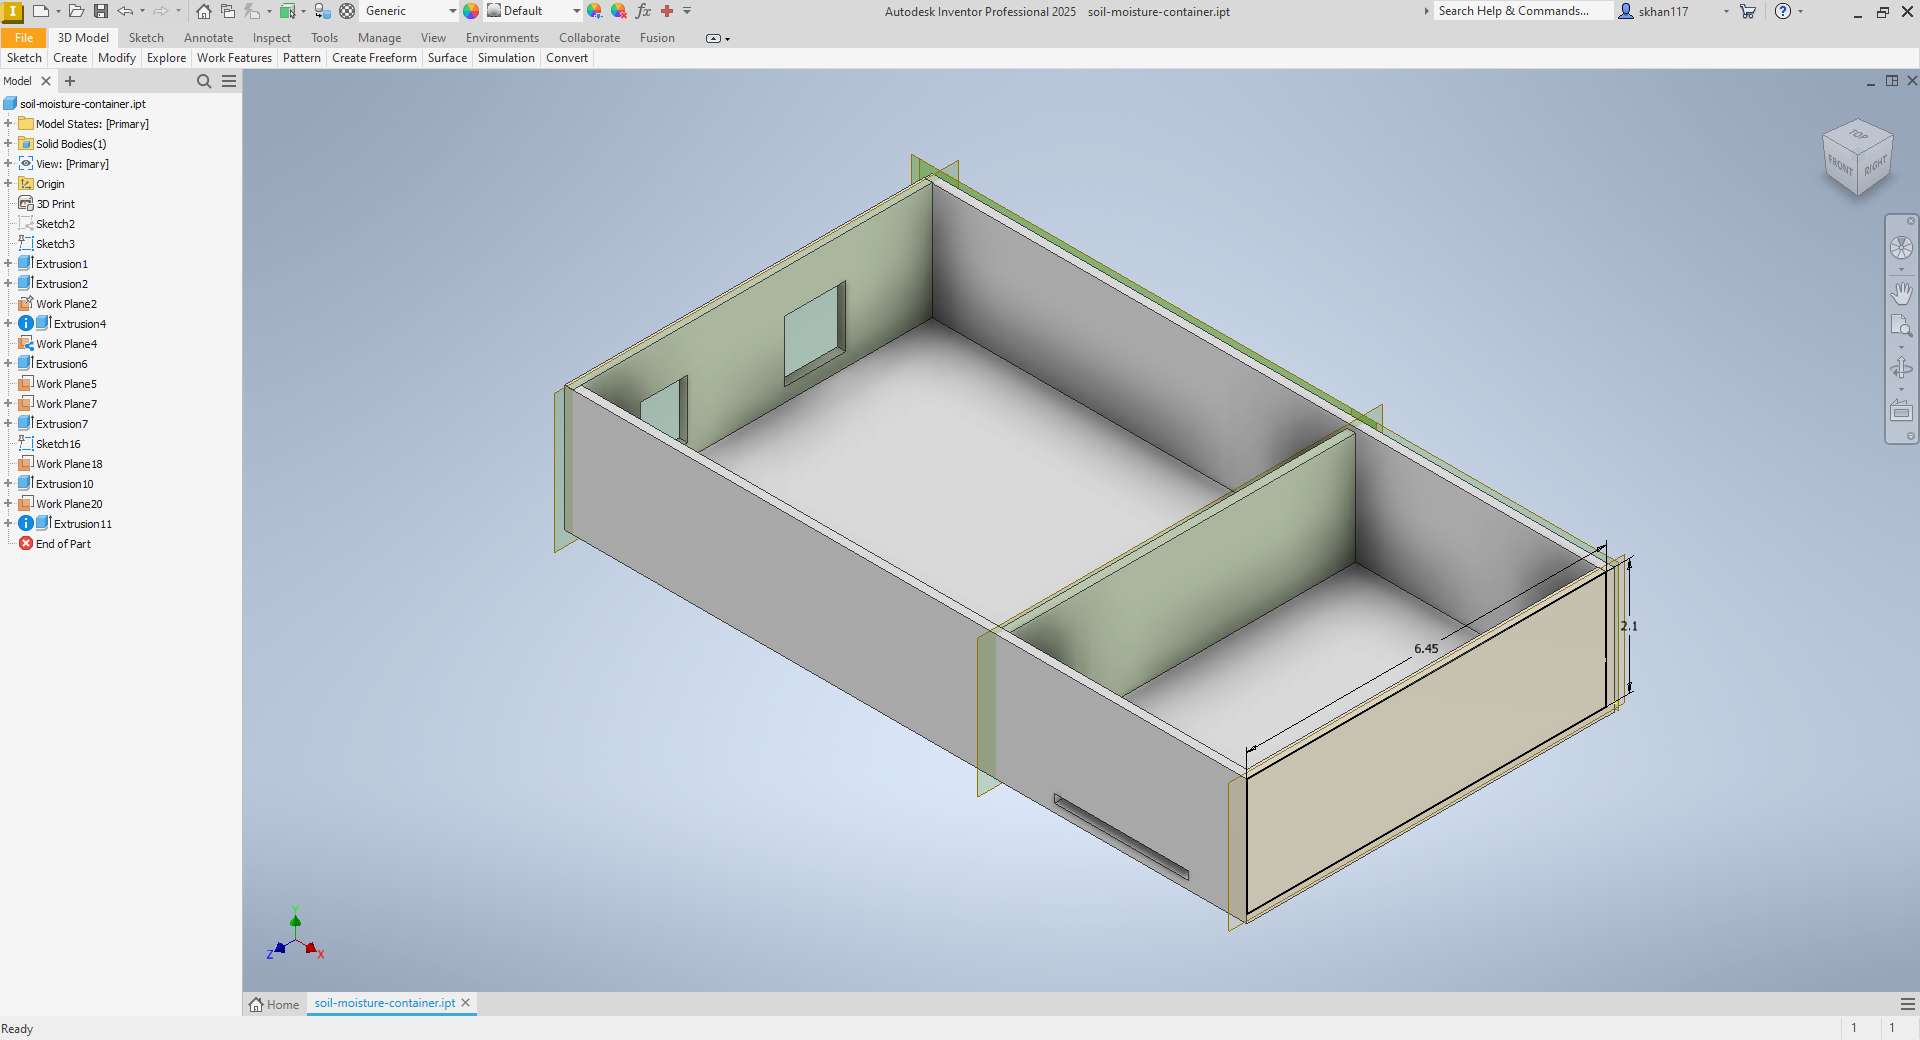
Soil Moisture Detector Compartment (With AutoCAD Inventor)